Showing posts with label Recipe. Show all posts

Monday, July 22, 2013

Pat's Biscuits and Sugar Butter


This recipe has its origins in the pioneer era and has been handed down through four generations in my family. My mother's classic biscuit is very much like the version that is eaten widely throughout the South. I believe that the sugar butter may come from Virginia, where my great-grandparents settled after emigrating from Wales. Like many truly great recipes, this is one that has survived many generations and carries with it the love with which the food is made.

The saltiness of the biscuit with the praline flavor of the sugar-butter syrup is a tasty treat not to be missed. Serve with scrambled eggs and fresh bacon. Set your table with special "Sunday breakfast" dishes that you use every Sunday. To round out the meal, brew a pot of black tea or fresh coffee.

For a shorter, richer biscuit, use 6 tablespoons butter in the dough. For a lighter, airier biscuit, use just 4 tablespoons.

biscuits


Biscuits

MAKES 12 BISCUITS

1 3/4 cups all-purpose flour
2 1/2 teaspoons baking powder
1 teaspoon fine sea salt
4 - 6 tablespoons salt butter, at room temperature, plus 3 tablespoons melted butter
2/3 - 1 cup whole milk
Accompaniments: butter, jam, marmalade, and Sugar Butter (see below)

1. Preheat the oven to 450 degrees Fahrenheit. Grease a baking sheet.
2. Put the flour, baking powder, and salt in a food processor and pulse to combine. Add the room temperature butter and pulse until the mixture is the consistency of cornmeal.
3. Add 2/3 cup milk and pulse until just combined; add more milk a little at a time, if necessary, to make a soft dough. When the dough forms one large ball, remove from the processor.
4. Lightly knead the dough on a floured board for 30 seconds, roughly 10 folds. The dough should be moist and light; heavy dough will make tough biscuits. Gently form the dough into a ball and roll it out 1/2 inch thick on a floured board using a floured rolling pin. Cut the biscuits with a round biscuit cutter or with a mid-size drinking glass.
5. Brush the tops of the biscuits with the melted butter. Bake for 12 - 15 minutes, until lightly browned. Remove from the oven, but keep the biscuits on the baking sheet until ready to serve.

biscuits


Sugar Butter

MAKES ENOUGH FOR 12 BISCUITS

1 cup salted butter
1 cup brown sugar
1/2 cup heavy cream, or more if necessary

1. In a small saucepan over medium heat, melt the butter, then stir in the brown sugar and cook until the mixture bubbles. Add the cream, and turn down the heat to keep the cream just below a simmer. Cook for about 10 minutes on low heat, until the sugar is dissolved and the flavors are balanced. The syrup with be creamy in texture. If you need more, just add a bit more cream.
2. Transfer the sugar butter to a gravy boat-type server. Use a small gravy ladle to serve the syrup.

Enjoy!


Monday, July 15, 2013

Pasta Estiva (Summer Pasta)


Here, the soft, small mozzarella balls are cut in half so they melt throughout the dish of pasta. The combination of the sweet, tangy tomato sauce with the crunchy, buttery pine nuts and soft, oozing mozzarella makes a very special eating experience.

This pasta dish is easy and inexpensive to make. It is a dish that is rich in protein and carbohydrates, making it a wonderful one-dish meal. A simple green salad or crudités with small bowls of extra-virgin olive oil and sea salt for dipping served alongside is perfect, and a crisp dry white wine like Greghetto or a Pinot Grigio makes the meal complete.


SERVES 4 - 6

1/4 cup extra-virgin olive oil
1 pound cherry tomatoes, halved
10 fresh basil leaves, roughly chopped, plus more whole leaves for garnish
1 clove garlic, minced
1 pound dried short pasta (such as penne or campanelle)
15 small balls fresh mozzarella, halved
1/4 cup pine nuts, toasted
1/2 teaspoon sea salt

1. In a large saucepan, heat the oil over medium heat. Add the tomatoes, basil, and garlic.
2. Cook until the tomatoes are soft, 15 to 20 minutes. Remove from heat.
3. Cook the pasta in a large pot of boiling salted water until al dente; drain well, then transfer the pasta to the sauté pan with the sauce. Add the mozzarella balls and toss to combine them with the tomato sauce and pasta. Add the pine nuts and toss. Add the salt and mix again.
4. Serve immediately on a large oval platter, garnished with large basil leaves.

Enjoy!


Monday, July 1, 2013

Ricotta Tart


BBQs and picnics are two of the best ways to spend Independence Day, and every outdoor meal needs a tempting treat for dessert!

ricotta tart

This simple, classic tart from central and southern Italy is similar to a cheesecake, but fluffy and light, and without the heavy flavor and feel of cream cheese. A slice of this tart makes a perfect after-dinner dessert during the summer or an ideal midday snack.

MAKES 1 9-INCH TART, SERVES 6 - 8

2 cups part-skim ricotta
3 large eggs
1 cup sugar
1/2 cup whipping cream
Grated zest of 1 lemon
1/2 cups whole milk
1/2 recipe (1 ball) My Mom's Extra-Flaky Pie Crust Dough

Preheat oven to 350 degrees Fahrenheit.

In a large bowl, combine ricotta, eggs, sugar, cream, lemon zest, and milk. Set aside in the refrigerator.

Using a floured rolling pin, roll the dough out into an 11-inch circle. Slip a pie pan under the dough and gently adjust it to fit a 9-inch tart pan. Use your knuckle to form a fluted edge around the pie. Fill with the ricotta mixture. Bake for about 50 minutes, until a knife inserted into the filling in the center comes out clean and the crust is browned.

ricotta tart


Enjoy!


Monday, June 10, 2013

My Famous Tomato Vodka Sauce

One of my favorite (and simplest) dishes to make is pasta with vodka sauce. It doesn't take long to prepare and with only a few stirs, it practically cooks itself. Adding vodka to the sauce lends a certain opulence to the dish, but it also helps to bring out the flavor of the tomatoes.

tomato vodka sauce


I like to prepare this sauce for easy meals with family and friends and when I do, I am almost always asked for the recipe! Enjoy!

SERVES 4

1 large carrot
2 ribs celery with leaves
1 onion
4 cloves garlic
1/2 cup good-quality extra-virgin olive oil
2 (28 ounce) cans San Marzano Roma tomatoes
1 teaspoon sea salt
1/2 teaspoon sugar (if necessary)
1/4 cup heavy cream
1/2 cup vodka
Pinch of pepperoncini, or hot red pepper flakes

1. Dice the carrot, celery, onion, and garlic (this can also be done in a food processor).
2. Put the oil in a large saucepan and place over medium heat. When the oil is hot, add the chopped vegetables to the pan and sauté over medium heat until just soft, about 5 minutes.

cooking

3. Puree the tomatoes in a good processor, then add them to the pan. Add the salt and sugar if necessary (I find that the San Marzanos are usually sweet enough on their own). Let the sauce simmer, uncovered, for 1 hour, stirring occasionally.
4. Add the cream and vodka and simmer gently for 30 minutes; do not boil, or the sauce could curdle. Add the pepperoncini, then serve over pasta.


Tuesday, May 28, 2013

Pasta Ortolano (Greengrocer-Style Pasta)


italian countrysideitalian countryside


Pasta Ortolano is the quintessential spring pasta, using the best of the fresh produce available in early spring. It is inspired by my love of the Italian countryside and the bounty of vegetables available. The dish offers a delightful mixture of textures: velvety wilted spinach, slightly crisp asparagus, and firm spring peas that burst upon the tongue. The flavors are light and distinctly green. This is a very fresh-tasting dish that is easy to eat and makes you feel very healthy after you eat it. Serve with Prosecco, a sparkling white wine from Italy.

cheese

SERVES 4

1/4 cup extra-virgin olive oil, plus more if necessary
4 ounces spinach, washed and chopped into 3-inch pieces
1 pound very thin asparagus, ends trimmed, cut into 2-inch lengths
1/2 cup shelled spring peas or frozen baby peas
1 clove garlic, minced
Sea salt
1/4 cup dry white wine
1 pound dried penne rigate pasta, preferably De Cecco brand
Parmigiano-Reggiano cheese, in one piece for grating

1. In a large saute pan, heat the oil over medium-high heat. Add the spinach, asparagus, peas, garlic, and 1 teaspoon salt and saute, stirring constantly, until the spinach is wilted and the asparagus and peas are tend but not mushy, about 10 to 15 minutes. Add the wine and cook until it has almost evaporated, about 5 minutes.

2. Meanwhile, cook the pasta in a large pot of boiling salted water until al dente (with a little give), 12 to 15 minutes. Drain in a colander.

3. Put half of the vegetable mixture in the pasta pot, then return the pasta to the pot and top with the remaining vegetable mixture. Toss to combine the pasta and vegetables, adding salt to taste if necessary. Add a drizzle of oil if the sauce seems too dry. Grate cheese over the top and serve immediately.

Enjoy!


Monday, May 13, 2013

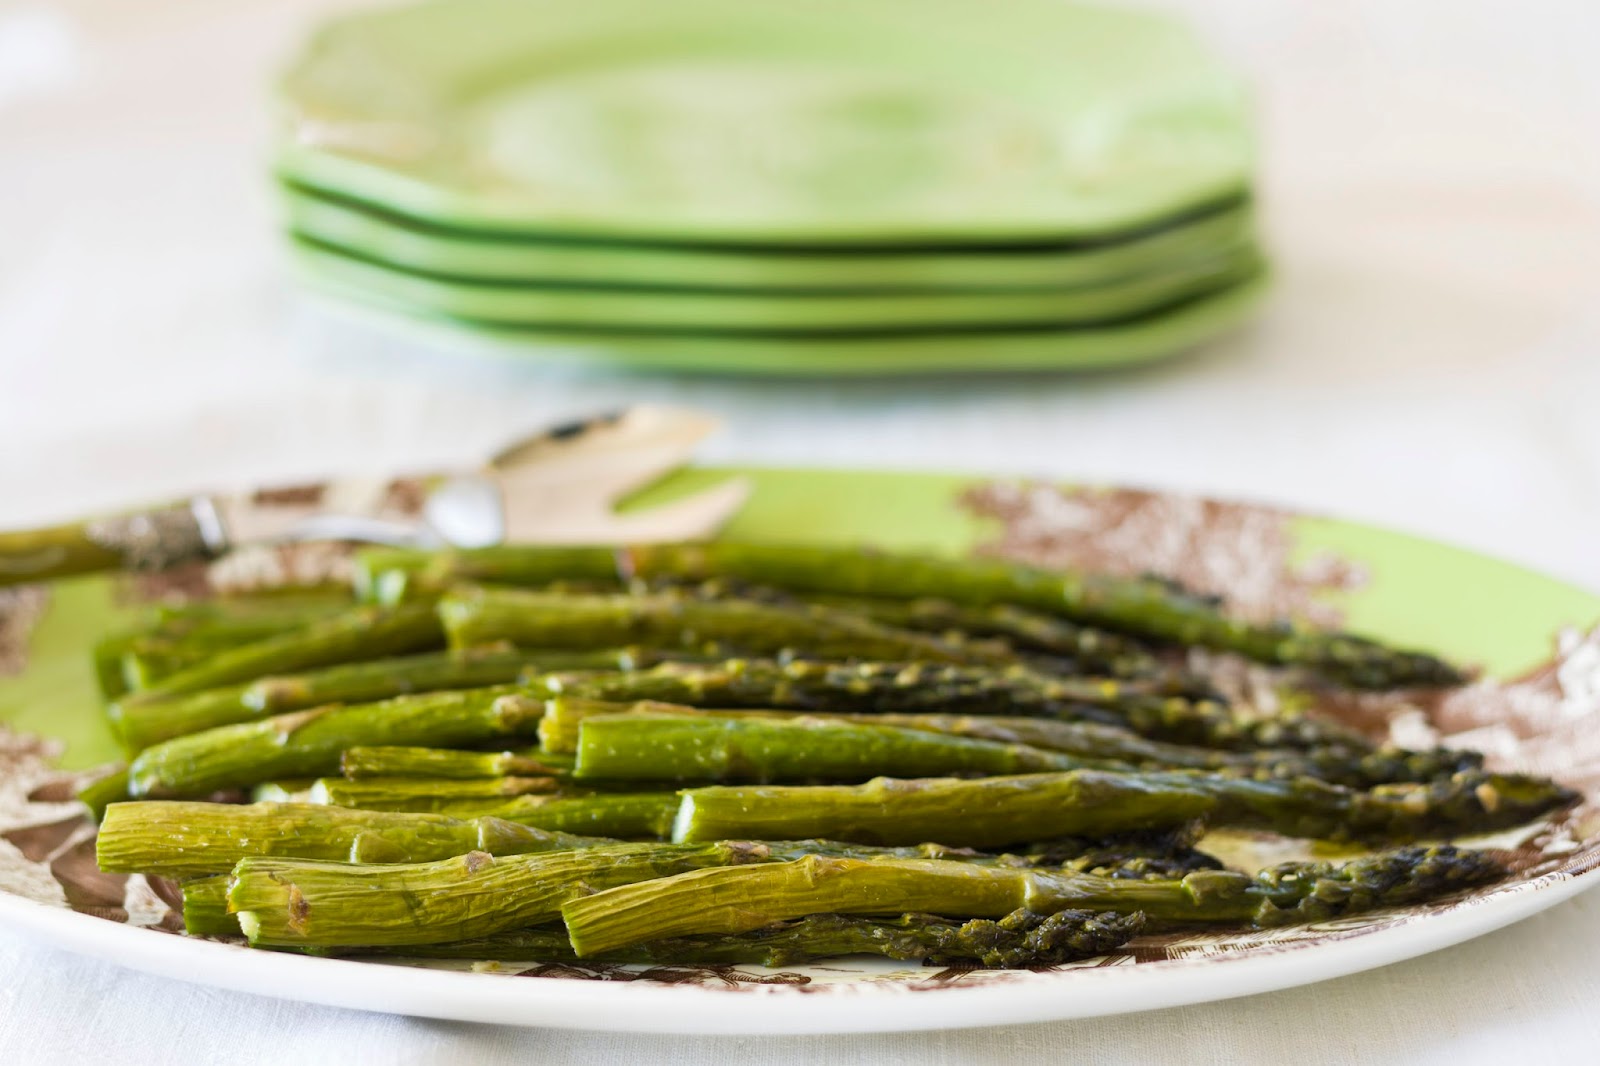
Asparagus Frittata

A frittata is an endlessly adaptable Italian baked omelet and a staple of la cucina povera, "the poor kitchen" - or more accurately "the simple kitchen" - in which leftovers are never wasted but rather turned into gastronomic delicacies.

asparagus frittata

Asparagus is one of my favorite vegetables and has many healthy benefits. In this recipe I use asparagus, but you can use any fresh vegetables that happen to be in season. Try this as a main course; it is delicious with a simple salad, crusty bread, and a nice red wine.

asparagus

SERVES 4

1/4 cup extra-virgin olive oil
1/2 pound asparagus, ends trimmed, chopped
1/2 cup shelled baby English peas (or frozen baby peas)
1 clove garlic, minced
3 scallions, white parts only, minced
12 leaves baby spinach, chopped
6 large eggs, beaten
1/2 cup freshly grated Parmigiano-Reggiano cheese
1/4 cup freshly grated mozzarella cheese
Sea salt and freshly ground black pepper
2 tablespoons chopped fresh parsley

1. Preheat the oven to 350 degrees Fahrenheit.
2. In a medium saucepan, heat half of the oil over medium-high heat. Add the asparagus, peas, garlic, scallions, and spinach and saute until just tender, 10 to 15 minutes. Set aside.
3. Coat the bottom of an ovenproof saute pan pan with the remaining oil and heat  on the stove-top over medium heat. Add about half the eggs. Let the eggs cook to form a layer, and then moved the cooked layer with a spatular to allow the uncooked egg to flow to the bottom. Add the sauteed vegetables. Sprinkle the cheeses over the vegetables, then cover the cheese with the remaining eggs, and the parsley. Season with salt and pepper to taste.
4. Bake for 10 to 15 minutes, until the egg is firm. Remove from the oven, cut into wedges, and serve immediately.

Enjoy!


www.rosannainc.com

Monday, May 6, 2013

Mother's Day Cookies


Mother's Day is this weekend and I always like to celebrate by baking my mother's recipe for sugar cookies in her honor. My mother was well known for her sugar cookies. While she would sometimes ban my sisters and I from the kitchen so she could devote her full attention to baking, she would always let us help with sugar cookies. She allowed us to roll them out, cut them into shapes, and sprinkle them with a wide variety of sparkly sugar confections. They were always delicate and crunch. "The secret to delicious pastry is to not overwork the dough, girls," she would say. I remember her words to this day, and I repeat them to my girls, who I hope will repeat them to their girls, and so on...

mother and daughters
Here I am (as a baby!) with my mother and two older sisters.


These are wonderful cookies to be enjoyed while making and eating, as well as a wonderful tradition to start with loved ones. Show your mother you care this Mother's Day with a beautiful display of homemade sugar cookies.

sugar cookies


MAKES ABOUT 24 COOKIES.

2 cups all-purpose flour
1/2 teaspoon baking soda
1/4 teaspoon salt
1/2 cup butter, softened
1 cup sugar
1 large egg
1 tablespoon vanilla extract
Colored sugar crystal or candy sprinkles

1. Sift together the flour, baking soda, and salt onto a piece of wax paper. Set aside.
2. Using an electric mixer, cream the butter and sugar. Add the egg and vanilla and beat well. Add the dry ingredients a little at a time and mix until well combined. Wrap the dough in a clean kitchen towel or parchment paper and chill in the refrigerator for at least 30 minutes.
3. Preheat the oven to 400 degrees Fahrenheit. Butter baking sheets.
4. Roll out one-third of the dough to about 1/8 inch thick and cut out shapes with cookies cutters. Sprinkle the cookies generously with colored sugar crystal or candy sprinkles and transfer the shapes to the prepared baking sheets. Bake for 10 minutes, or until firm in the centers but not browned. remove the cookies from the sheets with a wide spatular and cool on wire racks. Repeat with the remaining dough. Store the cookies in a tin. They can be frozen prior to baking for up to 1 month, or stored in a cool, dark place for 1 week.

Enjoy and Happy Mother's Day!


www.rosannainc.com

Monday, April 15, 2013

Paglia e Fieno (Straw and Hay Pasta)


This dish got its name because the mixture of spinach linguine and plain linguine looks like a mound of straw and hay when served. I first ate this dish in Italy when I was a student spending my junior year abroad, and it became a favorite of mine the moment I tasted the saltiness of the prosciutto against the creamy texture of the sauce and the sweet explosion of the fresh peas. This is a perfect fish to serve in the spring as soon as fresh peas are available. Serve family-style in a large, low bowl, with a mixed green salad and the rest of the Pinot Grigio.

pasta


SERVES 4

1/3 cup extra-virgin olive oil
2 - 3 tablespoons butter
1 clove garlic, finely minced
1 scallion, finely minced
1/4 cup chicken broth
1 cup dry white wine (like Pinot)
1 tablespoon pureed tomato
2 ounces Italian prosciutto, cut into 1/2-inch cubes
1/2 cup heavy cream, at room temperature
8 ounces dried or fresh spinach linguine
8 ounces dried or fresh plain linguine
1/2 cup shelled fresh peas or frozen baby peas
Sea salt
Parmigiano-Reggiano cheese, in one piece for grating

1. In a large saucepan, combine the oil and butter and place over medium heat. When the butter has melted, add the garlic and scallion. Saute for 3 minutes, watching carefully so the garlic doesn't burn. Add the brother and wine and bring to a simmer. Add the pureed tomato and peas. Cook for about 5 minutes, until the sauce has reduced slightly. Add the prosciutto and cook for 5 minutes longer. Remove from the heat and set aside.

2. Meanwhile, cook the pastas together in a large pot  of boiling salted water until al dente (with a little give). Drain in a colander.

pasta

3. Put half of the sauce in the pasta pot, then return the pasta to the pot and top with remaining vegetable mixture and the cream. Toss to combine the pasta and vegetables, adding salt to taste if necessary. Grate cheese over the top and serve immediately.

pasta

Enjoy!


www.rosannainc.com

Thursday, March 28, 2013

A Special Easter Dessert


When we were little, every year around Easter, my mother made Bunny Cake to celebrate my sister's April birthday and the arrival of spring. If you're in a rush, I find that Dr. Oetker's organic vanilla cake mix works very well here, but if you prefer to make homemade cake, user the lawyers from my Grandma's Caramel Cake. Be creative with your choice of colors - you can make a pastel bunny or opt for bright colors, or go all white. Decorate the serving plate with fresh flowers and spring greenery just before serving. This cake makes a great centerpiece and is a wonderful way to welcome spring.


SERVES 6 - 8
  • 3/4 cup unsalted butter
  • 4 cups confectioners' sugar
  • 1/2 cup heavy cream
  • 1 teaspoon vanilla extract
  • 1/8 teaspoon salt
  • 3 tablespoons whole milk (if necessary)
  • 1 8-inch  round white cake layer, cooled to room temperature
  • 2 cups sweetened shredded coconut
  • Jelly beans or other candies, for eyes and nose
  • Paper ears made from charming spring wrapping paper
  • Large-leafed greenery such as lilac leaves to surround the bunny

1. In a large bowl with an electric mixer, cream the butter until very light and fluffy. Add the confectioners' sugar and cream and beat until smooth. Beat in the vanilla and salt. If the frosting is too thick, beat in the milk, 1 tablespoon at a time.

2. Cut the cake layer in half to make 2 semicircles. Spread the top of one semicircle with frosting and place the second on top. Stand the semicircle upright on a serving platter so the rounded side is up. Cut a small triangle out of one side and put it where the tail of the bunny would be (see diagram below).
3. Starting with the sides of the cake, spread the remaining frosting all over the bunny, being careful when you frost the cut areas of the cake so it doesn't crumble. Gently take handfuls of coconut and generously pat it all over the frosted bunny. Stick jelly beans onto the frosting to make eyes. Stick the ears in place. Surround the bunny with greenery and serve.

Enjoy!

Warmly,


www.rosannainc.com

Thursday, December 20, 2012

Cinnamon Crust Out of Extra Pie Dough


The holidays mean lots of gathering of friends and of course lots of delicious food! One holiday favorite is of course pie. Apple pie, pumpkin pie, pecan pie - whatever your personal favorite, you might have some extra pie dough sitting around. Instead of throwing it out, try my recipe for Cinnamon Crust!

cinnamon

This was my favorite treat as a child. When my mother made pies, she'd let me use the scraps of dough to make a delicious cinnamon-sugar pastry. My children and husband love this part of the pie. They gobble it down within minutes after it has cooled.

Cinnamon Crust
Pie dough scraps
Butter
Sugar
Ground cinnamon

  • Roll out the dough, in whatever shape; it can be misshapen. Place the dough in a small pie plate.
  • Put small pats of butter al over the dough, then sprinkle with sugar and cinnamon.
  • Fold the edges up to make an envelope.
  • Dot with more butter and dust the top with cinnamon and sugar.
  • Bake at 350 degrees Fahrenheit for about 15 minutes, until the crust is golden brown and the sugar is bubbling.
  • Let cool, cut into small wedges, and enjoy!

girl eating

For a delicious pie dough recipe, try My Mom's Extra-Flaky Pie Crust Dough.

I hope everyone has a lovely holiday!

Warmly,


www.rosannainc.com

Tuesday, November 20, 2012

My Thanksgiving Turkey


Turkey is the star of many Thanksgiving meals across the nation. It can be tricky to cook, especially the first time when many first-time Thanksgiving chefs are nervous. Follow my special recipe for turkey below and you're guaranteed a delicious bird the whole family will enjoy!


Rubbing the meat under the skin of the turkey with a flavorful paste of herbs, garlic, and prosciutto and letting it marinate in the refrigerator overnight ensures that it stays juicy as it roasts. Garnish the platter of sliced turkey with big branches of fresh rosemary and sage.

The size of the turkey will determine the number of servings. I would figure on 1 pound of uncooked turkey per person.

Cooking Chart

8 - 12 pounds (2 - 4 people): 2 3/4 - 3 hours
12 - 16 pounds (5 - 7 people): 3 1/2 - 4 hours
16 - 20 pounds (8 - 10 people): 4 1/4 - 4 3/4 hours
20 - 24 pounds (11 - 13 people): 4 1/2 - 5 hours

Rosanna's Special Thanksgiving Turkey

3 large sprigs fresh rosemary, stemmed
15 large leaves fresh sage
8 cloves garlic
1 tablespoon + 1 teaspoon coarse sea salt
4 slices prosciutto
1/2 cup extra-virgin olive oil, plus more for drizzling
1 organic, hormone-free turkey, preferably free-range, cleaned, giblets removed
1 large carrot
1/2 onion
1 rib celery
Fine sea salt
  1. Put the rosemary, safe, 5 cloves of garlic, 1 tablespoon of coarse salt, and the prosciutto on a board and mince them together. Drizzle the olive oil over the mixture and mince until the mixture is a thick paste.
  2. Place the turkey in a large stainless-steel, porcelain, or ovenproof glass roasting pan. Gently pull up the skin near the cavity and rub small spoonfuls of the herb mixture under the skin, pushing it all the way to the back of the breast. Make sure the breast is totally covered with the herb mixture. Put a heaping tablespoon of the mixture in the cavity of the turkey and rub it all over the inside. Put the carrot, onion, celery, and remaining 3 cloves of garlic in the cavity and sprinkle with the 1 teaspoon coarse salt. (The carrot and celery should be whole when inserted in the cavity with the half onion.)
  3. Rub the remaining mixture all over the top (breast) and bottom (back) of the turkey, as well as the legs. Generously season with fine salt all over the turkey and drizzle with more oil. Let the turkey marinate overnight.
  4. The next day (Thanksgiving), preheat the oven to 475 degrees fahrenheit.
  5. Roast for 20 - 25 minutes to brown the turkey. Lower the oven temperature to 325 degree fahrenheit and roast until the meat between the breast and leg registers 170 degrees fahrenheit and the thigh 180 on an instant-read meat thermometer, basting the turkey often with the pan juices to ensure a juicy turkey. The turkey is done when the drumstick moves easily and the juices run clear, not pink. Let the turkey rest, loosely covered with aluminum foil that does not touch the turkey, for at least 30 minutes before carving.
  6. Make the gravy (recipe below), if desired, then slice the turkey and serve.
Rosanna's Gravy

If your turkey-roasting pan isn't flameproof, transfer the drippings to a saucepan to make the gravy.

SERVES 8
1 tablespoon unsalted butter
2 tablespoons all-purpose flour
Drippings from turkey, clear fat skimmed off
1/2 cup dry white wine
Sea salt
  1. In a small saucepan over medium heat, melt the butter, then whisk in the flour. Cook the roux, whisking frequently, until the butter is a shade darker, but not browned - about 1 minute.
  2. Whisk the roux into the drippings in the roasting pan or another saucepan set over medium heat and cook, whisking constantly, until the roux is incorporated into the drippings. Add the wine and cook until the liquid is reduced by three-quarters.
  3. Taste and add more salt if necessary.
  4. Serve in a sauceboat and drizzle the sliced turkey with the gravy before serving.
rosanna bowles


Enjoy!


www.rosannainc.com

Tuesday, October 30, 2012

Halloween Treats


My mother made owl cookies every Halloween when I was growing up. Charming and delicious, they were always a hit with my friends. The dough is a basic refrigerator-cookie dough that is made ahead of time and can also be frozen. Children love to assemble and decorate these cookies, which features chocolate chips for eyes and a giant salted cashew for a nose to make up the perfect owl face.


owl cookies


This recipe makes a good-sized batch of large cookies for Halloween school parties or Halloween parties at home.

owl cookiesowl cookies


MAKES ABOUT 18 COOKIES

3 cups all-purpose flour
3 teaspoons baking powder
1/2 teaspoon sea salt
1 1/4 cups (2 1/2 sticks) unsalted butter at room temperature
1 1/3 cups sugar
2 large eggs
4 teaspoons vanilla extract
6 ounces semisweet chocolate chips, melted

Semisweet chocolate chips
About 18 whole roasted and salted cashews (or candy corn, if nut allergies are a concern)

  1. In a large bowl, combine the flour, baking powder, and salt.
  2. In another large bowl, using an electric mixer, beat the butter until soft. Continuing to beat, add the sugar slowly, then beat until the mixture is very light and fluffy. Mix in the dry ingredients.
  3. In a small bowl, beat together the eggs and vanilla, then add them to the dough a little at a time, mixing well after each addition.
  4. Transfer about one-third of the dough to a separate bowl and stir in the melted chocolate chips to make a chocolate dough. Shape the chocolate dough into a 10-inch-long log, working very quickly before the chocolate solidifies. Wrap in wax paper and put in the refrigerator.
  5. Roll out the remaining (vanilla) dough into a long rectangular shape as long as the chocolate log. Set the chilled chocolate log in the center of the vanilla rectangle and wrap it up so that a cross-section resembles a bullseye, with a vanilla out layer and a chocolate center. Wrap the log in wax paper and refrigerate until firm, at least 2 hours. (You can also freeze the dough for up to a month.)
  6. Preheat the oven to 375 degrees Fahrenheit. Butter 2 baking sheets. Place the chocolate chips and cashews in small bowls for easy access.
  7. Unwrap the logs and cut them into 1/8-inch slices. Join the two slices together by placing them side by side on a baking sheet and pinching them. Slightly pinch the two opposite sides of the rounds into pointy ear shapes. Place a chocolate chip upside down in the center of each chocolate eye, then embed a cashew into the center of the two joined circles. Repeat with the remaining slices, spacing the owls 2 inches apart on the baking sheets.
  8. Bake for about 10 minutes, watching closely, until lightly browned. Transfer the cookies to a wire rack to cool completely.
  9. Store the cookies in a large tin, with the layers separated by sheets of wax paper. Keep the tin in a cool place until Halloween, or freeze the cookies ahead of time. Be careful not to fill the tin too full to avoid breaking the two halves apart.
  10. Serve on a shiny black cake pedestal for a very spooky effect.
halloween
The owl cookies display on served on the Rococo Noir pedestals with the Dauphine candlesticks.


Enjoy!


www.rosannainc.com